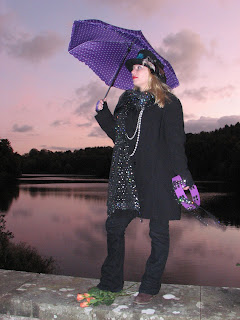
The Aperture setting on the camera is also known as the f-Stop. Like the pupil of your eye the aperture determines how much light comes through to the sensor.
Aperture Wide = more light = lower f-Stop = increase depth of field (background in focus)
Aperture Small = less light = higher f-Stop = reduced depth of field (background blurred)
Example:
Below are some Photographs I have taken trying out different Manual Settings and what I used to Create the effects.
 |
| This is Showing increase depth of field |
 |
| This is showing a reduced depth of field |
Shutter Speeds
The shutter speed determines length of time the shutter stays open and allows light to enter the camera to expose the film. It is measured in fractions of a second.
The shutter speeds of cameras can go from long exposures of 30 or more seconds to fast speeds of anything as short as 1/8000sec.
Fast moving objects or people will require a faster shutter speed.
Night Photography you may use a Slower Shutter Speed.
 |
| This Shows a blurred water effect by using 1/5 shutter speed and F/8 aperture. |
 |
| A fair ground ride taken at night using a slow shutter speed I used a tripod also so the camera did not shake. f/8 aperture 0.8 shutter speed |
 |
| I had to use a very slow shutter speed and tripod to capture the lights of moving cars from a bridge So at a 15 second shutter speed and f/5.6 this allowed more light into the lens. |
ISO
ISO Stands for International Standards Organisation.
The ISO means you can get a better exposure if there is not enough light.
The ISO value is a measure of the sensitivity of the camera to light.
Lower value = lower sensitivity
Higher value = higher sensitivity
In Digital cameras the ISO settings are usually 100, 200,400,and 800 or more
The lower value I would use in bright lights and the higher for a sports situation maybe where the camera would need to be kept still and the image could be grainier. (noise)
 |
| A better exposure |
Studio Lesson
We were introduced to a Studio setting at college and Steve showed us how to use the manual settings of a Canon 5D. We were shown and explained about the main settings of the Camera which are explained above. We were also shown the Bowens lighting equipment.
Below are some practise shots taken in the studio to show the different exposures.
Bowens lighting Equipment
Below are some practise shots taken in the studio to show the different exposures.
 |
| This photo was too under exposed Therefore the picture is too dark with shadows. |
-


No comments:
Post a Comment