Showing posts with label M3. Show all posts

Wednesday, 18 January 2012

Photoshop People and Portraits, Changing our images


                        Photoshop people and portraits
                      Changing Our Images.

                                         
                                         Original Image
This image I wanted to change to a darker image to go with the dark look I gave the model. 


                                         Photoshop Image
This image in black and white now gives a more dark atmospheric feel to the photo. 
Step1
I changed the image to Black and white by going into image then adjustments and selecting black and white.

Step2
To make the image look darker  I went into image then adjustments and selected H.D.R Toning and then changed some of the settings.

Step3
I decided to add some colour to the lips so by selecting a New Layer to work on I then picked the brush tool in the left side tool bar I changed the size of the brush to what would work best and then I selected a colour to use. I then went around the lips with the dark purple colour and then selected layers in the right tool bar and selected overlay. I then went around any mistakes using the eraser tool.

                                                              Original Image
 With this image I wanted to crop to get rid of the water mark on the right side of the photo and I wanted to change it to a black and white image to make it look more interesting.


Photoshop Image
I think by making the image darker it makes the model blend in with the scenery. but the lighting still takes your eye towards the model.


                                                     Step1
I first cropped the image by selecting the crop tool on the left tool bar and putting a grid over the image to select which part of the image I want. There was a slight water mark on the lens because it had been raining so I had to crop that out.

Step2
I then changed this image to a black and white photo by going onto image and then adjustments and selecting black and white.  By changing the different settings I got it to a light black and white colour but I wanted it to look darker so I changed the exposure.
                                                                      
                                                                                Step3
so for the final adjustment I  went into image adjustments and I selected HDR and altered the setting to get a darker look


Original Image
With this image I am going to change it to a Black and White as I think this would suit this particular portrait.

Photoshop Image
The final photoshop image looks much better and is more fitting to a portrait of a jazz pianist.


Step1
First I cropped the image a little by taking off some of the piano to focus more on the singer. I selected the crop in the tool bar and selecting the grid over what I wanted to keep in the image.


Step2 
I next changed the image to black and white by going into Image then Adjustments and selecting black and white.
Original Image
Done at home this photo needed to be worked on in photoshop.
Photoshop Image
I think this image looks different. I have managed to create a silhouetted shadow of the model against the background

                                                                                Step1
I cropped the image to frame the photo more against the model, by selecting the crop tool in the main tool bar.


                                                                              Step2
I then changed the exposure to create a more silhouetted look. I went into Image,adjustments and selected exposure which I changed to +0.14

Step3
I used the clone stamp tool in the main tool bar to get rid of the window frames exposed behind the white sheet.


                                                                             Step4
I put a white border around the image to frame the image more and make the silhouette stand out. By going into image and selecting canvas size I changed the width to 0.5cm and height to 0.5cm

                                                                     Labels,
                                     Theme2,  P5,M3,D3 


eres

Saturday, 17 December 2011

PhotoShop Event Photography, Changing Our Images

                                                               Photoshop

Below are images I have taken for People and Portraits and Reportage. It shows the original image and below a final image that I have created in photoshop by using different formats to enhance the photo, either by changing colour/balance,brightness/contrast,hue /saturation,HDR (high dynamic range), toning and variance. I have also changed some images to black and white to create a better look.                                     
                                        Original Image
This is the Original Image taken. There was not much I wanted to change in this image in Photoshop. I wanted it to look just how it was taken.It shows a lot already and by using a slow shutter speed I got the colourful  image showing motion that I was after. The only thing  I wanted to get rid of  was the people at the bottom.  As there were so many around it was hard to capture this image without getting someone in the way of it and I just wanted to have a photo of the ride itself.
                                       
                                       Photoshop Image 
This is the final Image produced. I think it has turned out well.
                   
Step1
This shows that in the original photo there are people in view at the bottom of the photograph. I decided to photoshop them out. By using the Clone Stamp Tool on the left of the tool bars. I carefully removed them.


                                                                            Step2
I then put a white border around the image to frame the photo better,I did this by going on to Image and then selecting Canvas size and selecting the colour white and changing the size of the borders thickness by width 0.5cm and height 0.5cm


                                                                              Step3
I also changed the Image Size by going on Image and selecting Image Size I changed the width to 11.3cm and height 8.54cm

Original Image
Another fairground shot taken that I am going to Photoshop. In the image above I like the composition and you can see a lot going on in this photograph, but I feel as though the colour doesn't really jump out at you and that's what fairground rides should do.

                                                            Photoshop Image                    
The final Photoshop image
I have managed to make the colours look more vibrant and I feel the rides stand out more.
                                                                           
                                                                           Step1
First I have gone onto image and then adjustments and selected vibrance and I have changed that to +100 and the saturation to +44
                                                                          
                                                                          Step2
To darken the image more I then went on adjustments and selected brightness/contrast and selected the brightness to -22 and contrast to 81.

Step3
I then selected adjustments and exposure and changed that a little to -0.46


Original Image
In this firework image I wanted to keep this as more of a natural image and just sharpen up the colours and detail better.


                    Photoshop Image                    
I think it has worked well and the image seems more alive with a bit more detail and colour exposed, by using photoshop, than there was in the original.


 Step1
First I cropped the image a little by using the crop tool which was in the tool bar to the left, I covered the photo with a grid and selected the grid to cover what I wanted to keep in the image. Then I right clicked the mouse and pressed crop.  

                                                                              Step2
Next to make the colours
 sharper I decided to do this with HDR toning. By going onto image and then adjustments and selecting HDR toning I could change some more settings to sharpen the colours and detail more.


Step3
I also used the magnetic lasso tool on the left tool bar and used it to go around some of the  fireworks at the side which were a bit solitary and straggly.So I  went to right click and then to fill  making sure it was on content aware. By pressing ok this removed  unwanted bits..


                                        Original Image
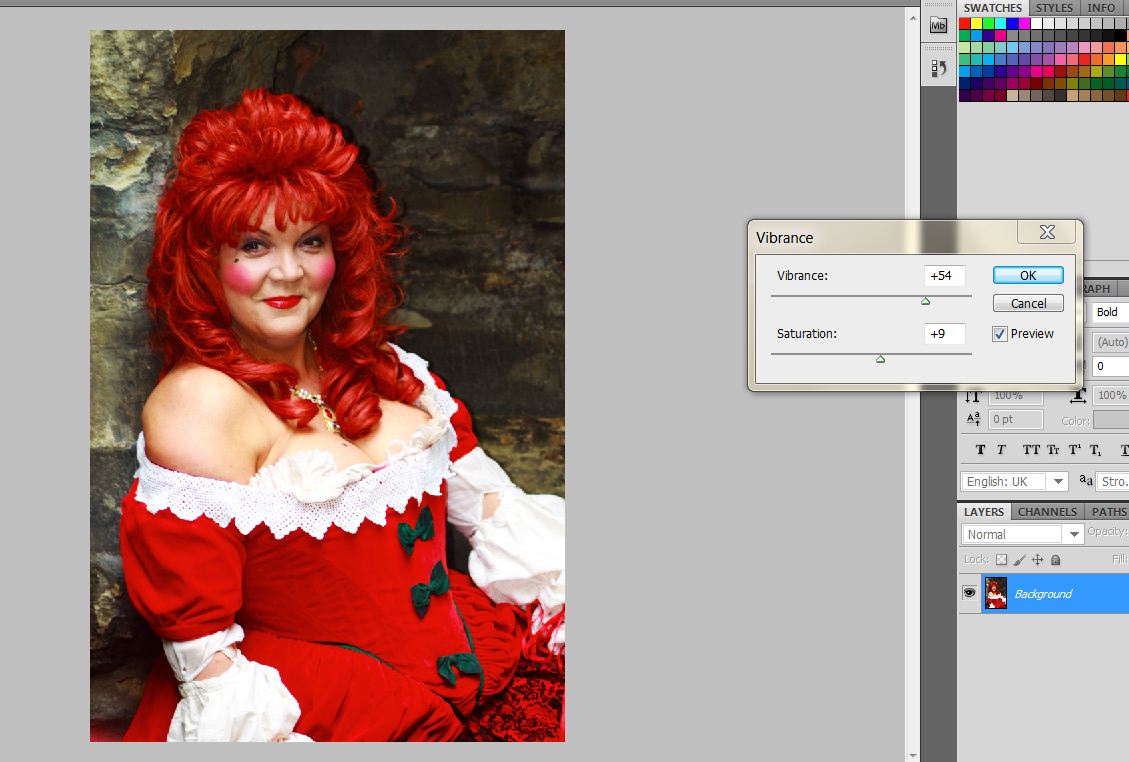
I wanted to make the colours even richer and to make her stand out against the background wall more.

                      Photoshop Image                    
I really like this finished image I like the deep richer tones and the darker background I managed to create. I think this image looks a bit like a painting. 


 Step1
First I changed the brightness to... and the contrast to.....

Step2
I then changed the vibrance/saturation to vibrance +54 Saturation +9 it looks brighter and the colours more vibrant.

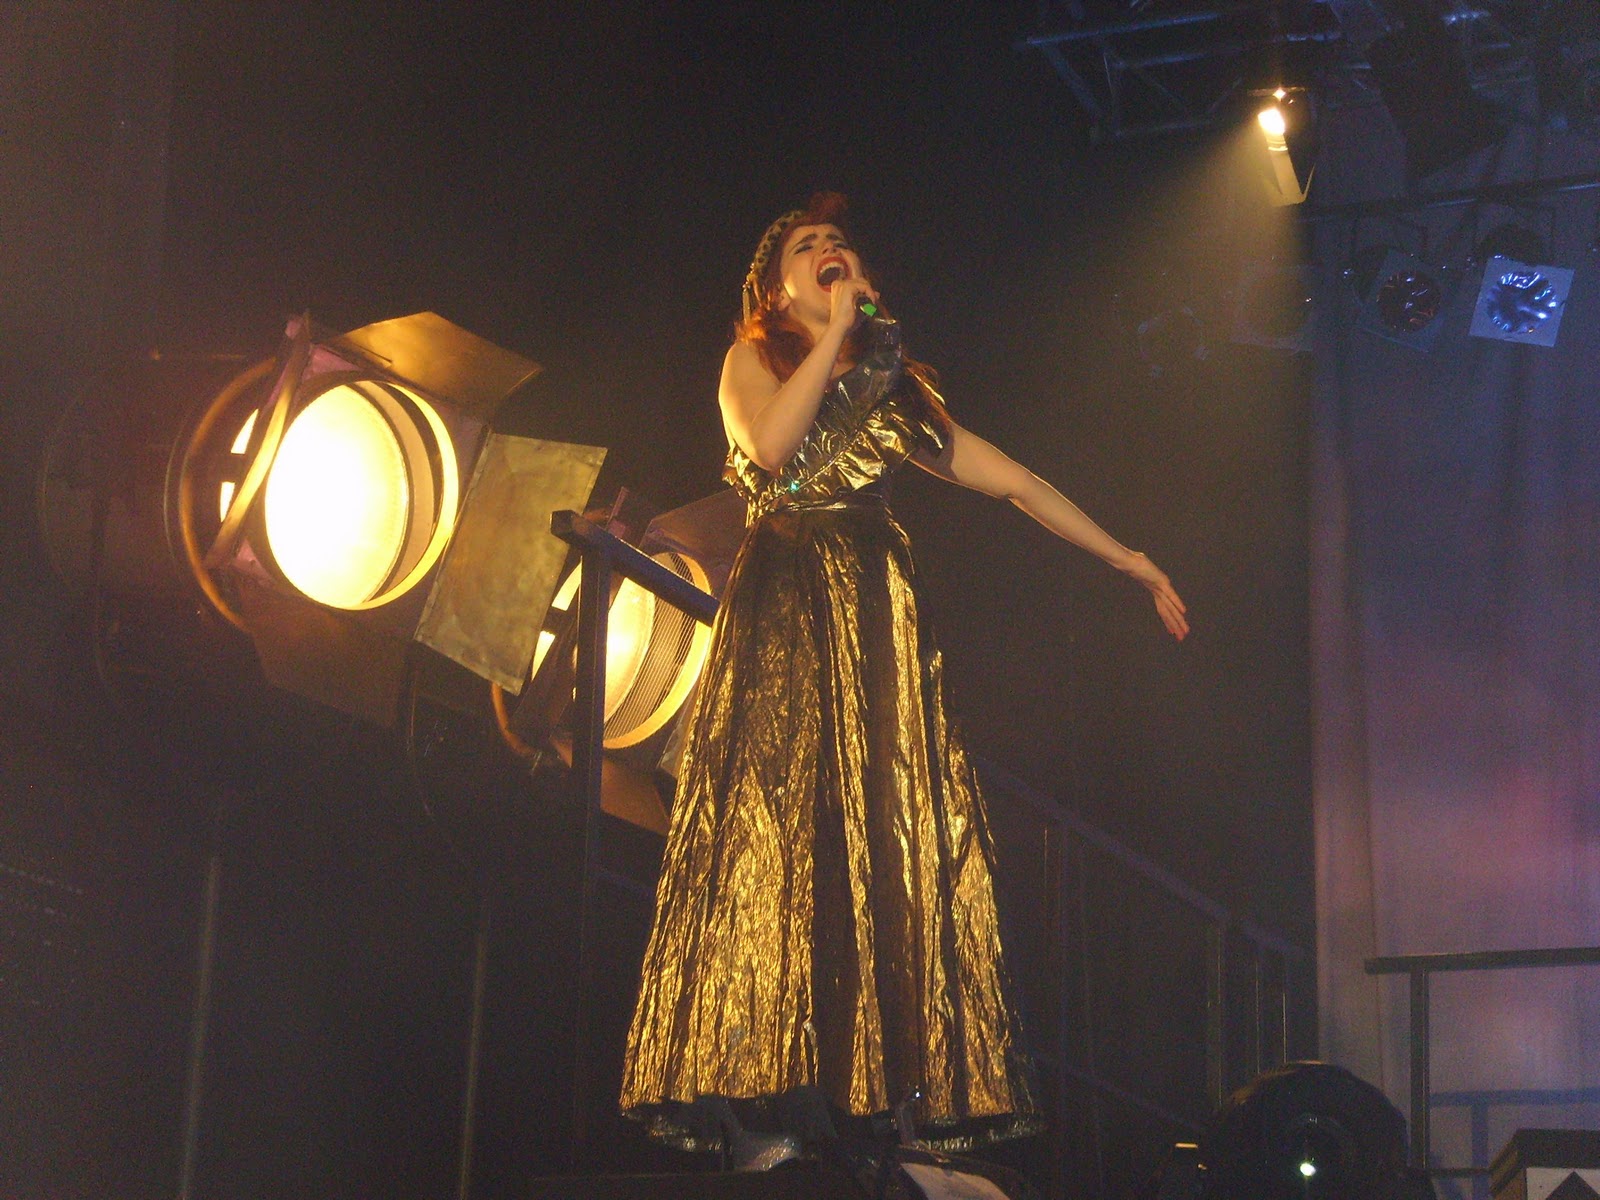
Original Image
With this image I wanted to make it look more framed and change it to a black and white photo to make it look older and more vintage which fits in with the singer's image.

                 Photoshop Image                    
I'm pleased with how this turned out. The stage lights really stand out and so does the singer and I feel that I achieved the old look I tried to portray.

Step1
First I cropped the image to get rid of  an unwanted stage that was in the original photo and to give the image more of a framed look.

                                                                             Step2
I then changed it to a black and white image by going onto image adjustments and then onto black and white choosing the intensity I liked.


Original Image
This is a Fun image. The background I feel needs changing in photoshop
                             

       Photoshop Image     
The background looks much better after I have edited it and the lighting highlights the models face well with a darker light going around the outside.

Step1
First I wanted to try and get rid of the shadows highlighted in the image above so by using the Clone Stamp tool in the main tool bar I carefully went around the shadows under the arms.

Step2
I changed the background lighting by using a different software for editing images called photoimpact.
By going into Effects and selecting lights I played about with all the selections to fit the image best and I picked out the middle image in the screen grab above to add the lighting effect.


Step3
I finally decided that the lighting was abit harsh and I wanted to dull the image down more and just make it a bit more wispey to mirror the brides veil.

Labels
Theme1 P5, M3, D3


                                                                   I